The BitX 40 – a QRP rig, assembled and available online is for Php3,200 kit only. It is a 40-meter SSB transceiver module kit with digital control composed of Raduino (Arduino Nano) and Main Transreceiver board, connectors and external components. All you have to do is to provide the box, microphone and speaker that would cost you additional Php300. Assembly is easy because the main board and all SMD and other components are already soldered. This transmitter provide you with a maximum 7watts of power on a 2-ampere, 12 volts power supply. The assembly and kit building requires minimal effort and it is very fun. A newbie hobbyist must assemble and have one to relive the spirit of home brewing radio and peripheral equipment among amateur radio operators.
BitX 40 is available online thru HF signal.com. It was developed and produced by HF Signals founded by Ashhar Farhan, VU2ESE. According to the manufacturer, the BITX boards are hand-assembled by women and hand-wound thus provide those women with livelihood.
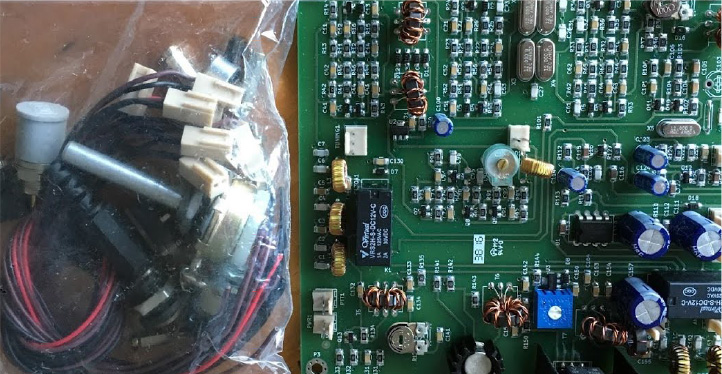
First, check the package, the content of the kit. Content list comes with the kit, or you can download it from http://www.hfsignals.com/index.php/bitx40/. You can also download the circuit description and diagram of the kit at http://www.hfsignals.com/index.php/2017/11/23/bitx40-circuit-description/.
Parts list.
SSB transceiver module, covering 7 MHz band
Arduino Module (Nano)
BNC connector for the antenna
Two earphone-style audio jacks for the mic and the earphones/speaker
DC power socket and plug
Volume control with on/off switch
10k linear pot for tuning
8 brass standoffs with mounting nuts and bolts
Connectors with wires for all connections to the board
https://www.youtube.com/watch?v=_n7hTZV6PCY
Also prepare the mic, speaker, and the box.
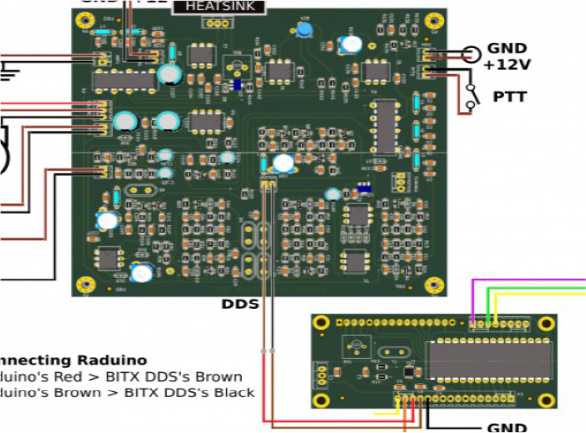
Second, wire up the components. The step by step procedure can be viewed at http://www.hfsignals.com/index.php/2017/11/23/wiring-up-the-bitx40/ . These includes all connection and schematic diagrams of the circuits; wiring up the DC connections, connecting the Arduino Nano component and other SMD.
Connection Diagram
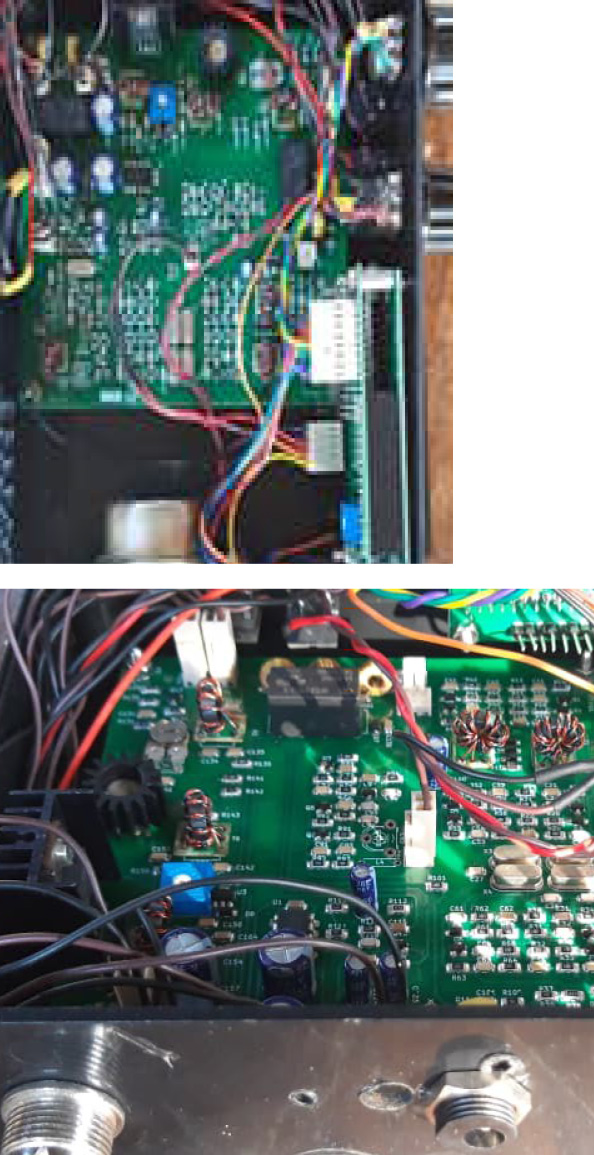

My BitX 40 within the box.
Third, connect the volume control, speaker, mic and push to talk, and calibrate the output power and other settings. Put it in a casement or box.
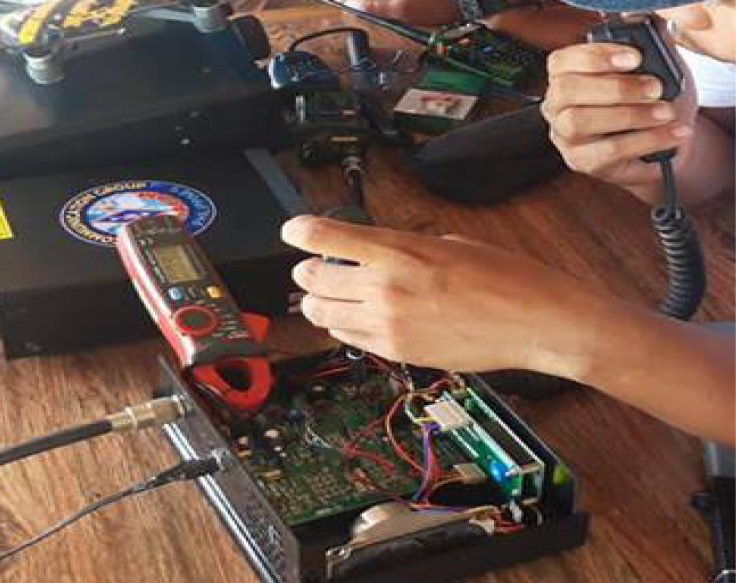
DV4JNL – Jonel Acuńa, trimming the power output and calibrating the module.
Connect antenna and power supply, and call CQ...
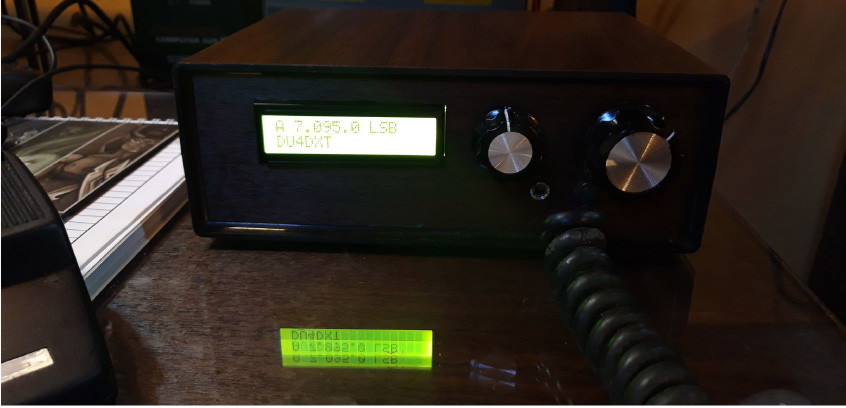
My BitX 40 working on QRP at PARA DU Net.
With collaborative efforts of the Islacom group, we managed to assemble six BitX 40 and one uBitX. DV4JNL, DW4LIG, DW4JTT, DW4STM, DV4FSP, DW4PLN, and DV4BCV are now monitoring and joining the 40m net as well as making regular QSO with this QRP rig. And another five BitX40 is coming for other members. Our Next Project would be a power amplifier for uBitX.
References:
BitX40 Diagrams, Circuits, and Procedure, 2018, http://www.hfsignals.com/
BitX Strategy; How to Assemble It , https://www.youtube.com/watch?v=RJSC5N0wsJ0
Assembling the BITX-40: KE0OG Kwickie, https://www.youtube.com/watch?v=rOYl6ywMgaM